Trail cameras aren’t just for hunters anymore. These rugged, battery-powered devices have carved out a niche in home security, and for good reason. Unlike hardwired systems, trail cameras run independently, blend into outdoor spaces, and capture activity in areas where traditional cameras can’t reach. They’re weather-resistant, affordable, and dead simple to install. If you’ve got a shed, driveway, or wooded perimeter that needs monitoring, trail cameras offer a DIY-friendly way to keep an eye on things without running cable or calling an electrician. Here’s what you need to know to set one up right.
Table of Contents
ToggleKey Takeaways
- Trail cameras for home security offer a cost-effective, wire-free alternative to traditional systems, running $50–$200 with weeks or months of battery life between charges.
- Optimal placement at driveways, gates, sheds, and property perimeters—mounted 3–6 feet high and angled downward—significantly improves facial recognition and deters trespassers or thieves.
- Look for trail cameras with fast trigger speeds under 0.5 seconds, at least 12-megapixel stills, 1080p video, and adjustable motion sensitivity to minimize false triggers and capture clear evidence.
- Trail cameras excel in remote locations beyond Wi-Fi and power reach, making them ideal for monitoring detached garages, rural properties, and outbuildings where hardwired systems are impractical.
- DIY installation requires only basic tools and SD card setup, with most models tested for proper detection zone coverage in 24 hours before relying on them for security.
- Consider pairing trail cameras with cellular connectivity ($5–$15/month) for remote image delivery, or combine them with traditional security cameras on high-priority areas like front doors for comprehensive property protection.
Why Use a Trail Camera for Home Security?
Trail cameras excel in scenarios where conventional security systems fall short. They’re built for remote deployment, which makes them ideal for outbuildings, gate entrances, rear property lines, or anywhere beyond the reach of Wi-Fi or power outlets.
Battery life is the standout feature. Most trail cameras run on AA batteries or rechargeable lithium packs and can operate for weeks or months between changes. That’s a huge advantage for monitoring detached garages, sheds, or large rural properties where running electrical is impractical.
They’re also inconspicuous. Trail cameras are designed to camouflage in outdoor environments. Mounted on a tree or fence post, they’re less likely to draw attention than a white dome camera. This makes them useful for catching trespassers, vandals, or package thieves who might avoid obvious surveillance.
Another benefit: standalone operation. Trail cameras record to an SD card or transmit images via cellular connection. No router. No cloud subscription required (though some models offer it). If someone cuts your internet, the trail camera keeps logging.
Finally, they’re affordable. Entry-level models start around $50–$80, and even feature-rich units with cellular connectivity typically run under $200. Compare that to a multi-camera hardwired system, and the cost difference is significant, especially for monitoring low-risk zones.
Key Features to Look for in a Home Security Trail Camera
Not all trail cameras are created equal. Here’s what separates a decent model from one that’ll leave you frustrated.
Motion Detection and Trigger Speed
Passive infrared (PIR) sensors detect heat signatures and trigger the camera when movement crosses the detection zone. The quality of this sensor matters. Look for a detection range of at least 50–80 feet and a trigger speed under 0.5 seconds. Slow trigger speeds mean you’ll capture the back of someone’s head, or nothing at all.
Adjustable sensitivity settings are critical. Too sensitive, and you’ll fill your SD card with wind-blown branches. Too low, and you’ll miss activity. Models with multi-zone detection or customizable detection areas help reduce false triggers.
Some higher-end units offer time-lapse mode plus to motion activation. This is useful for monitoring construction sites or tracking daily patterns, though it drains batteries faster.
Night Vision and Image Quality
Infrared (IR) LEDs or low-glow/no-glow LEDs enable nighttime recording. Standard IR illuminates subjects up to 60–100 feet but emits a faint red glow visible to the human eye. No-glow models are invisible but sacrifice some range, usually topping out around 50 feet.
For image quality, aim for at least 12-megapixel stills and 1080p video. Anything less and you won’t be able to identify faces or license plates. Video length per trigger is also worth checking, many cameras default to 10–30 second clips, which is fine for most applications.
Some trail cameras now include color night vision using white LEDs or starlight sensors. These produce clearer, more detailed images than IR but drain batteries faster and may not be as covert. It’s a trade-off depending on your priorities.
Best Locations to Install Trail Cameras Around Your Home
Placement makes or breaks effectiveness. Trail cameras work best when they cover choke points and high-traffic areas.
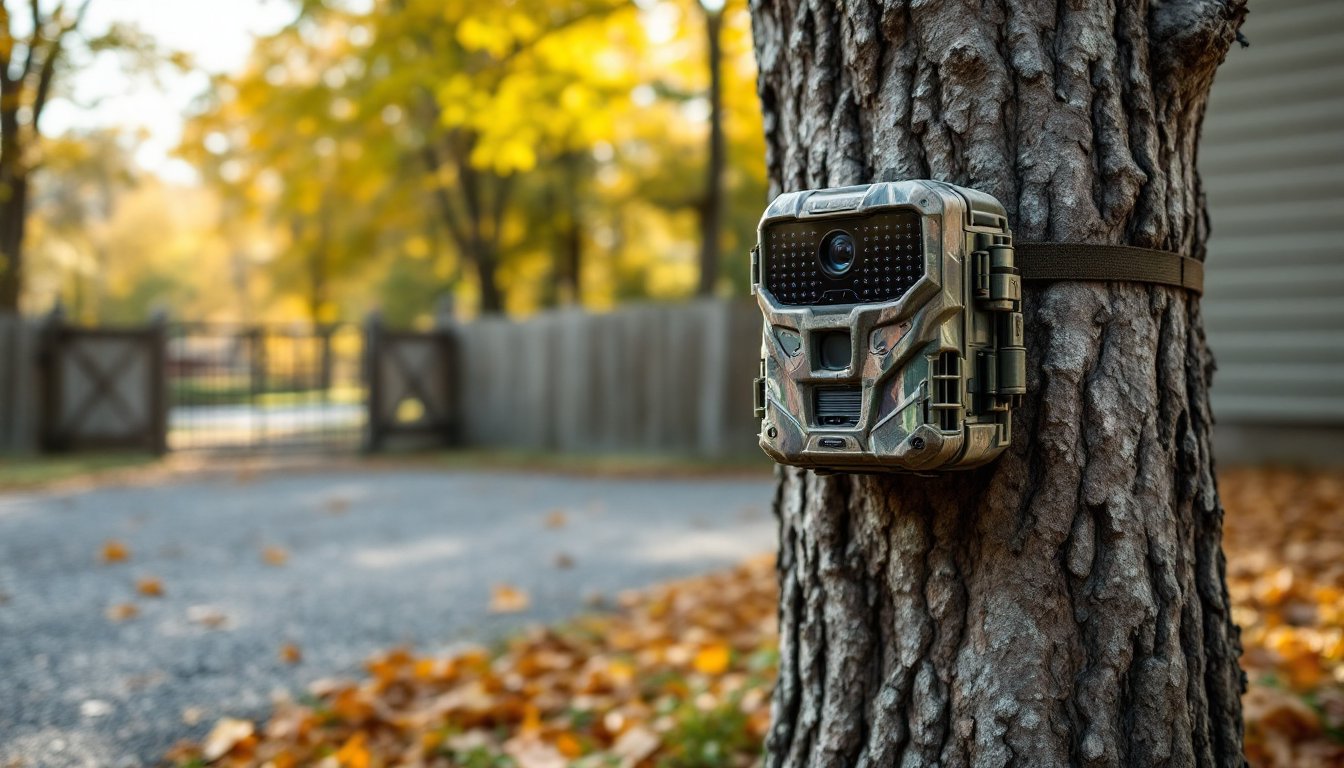
Driveways and entry gates are top priorities. Mount the camera 4–6 feet high on a post, tree, or building, angled slightly downward to capture faces and vehicle details. Avoid pointing the camera directly at headlights, glare will wash out the image.
Shed and detached garage doors are common targets for theft. Position the camera to cover the entry point, ideally from an angle that’s not immediately visible when someone approaches. Consider mounting it on an adjacent structure or tree rather than directly above the door.
Backyard and side gates often go unmonitored. A trail camera here catches anyone cutting through your property or accessing the backyard. Mount it high enough that it’s not easily reached but low enough to capture clear facial images.
Property perimeters and wooded areas are ideal for rural homes or larger lots. Trail cameras thrive in these environments. Use multiple units to cover trails, easements, or any natural access routes onto your land.
Package delivery zones near the front porch or mailbox can deter porch pirates. Just be mindful of camera angle, position it to avoid triggering on every passing car or pedestrian.
One tip: avoid placing cameras where they’ll face direct sun during peak hours. Heat and glare reduce image quality and can cause false triggers. If you’re mounting on a tree, make sure it’s stable, swaying in the wind will trigger the motion sensor constantly.
Setting Up Your Trail Camera: A Step-by-Step DIY Guide
Installation is straightforward, but a few prep steps will save you headaches.
Materials & Tools:
- Trail camera (with batteries and SD card)
- Mounting strap or bracket (usually included)
- Screwdriver or drill (if using wall mount)
- Cable lock (optional, for security)
- Ladder (if mounting above 6 feet)
Step-by-Step Installation:
-
Insert batteries and SD card. Most trail cameras use 4–8 AA batteries. Format the SD card in the camera’s menu before first use to avoid compatibility issues. Check the manual for max card size, typically 32GB or 64GB.
-
Configure settings. Set the camera to photo, video, or both. Adjust motion sensitivity, start at medium and tweak after reviewing a day’s worth of footage. Set the date and time stamp so you know when activity occurred.
-
Test the detection zone. Before mounting, walk in front of the camera at various distances and angles. Verify the PIR sensor is triggering reliably and that the frame captures what you need. Make adjustments now, it’s easier than climbing a ladder twice.
-
Choose your mount. Straps work well on trees and round posts. For buildings or fences, use the screw-mount bracket. Position the camera 3–6 feet high for general surveillance, higher if you’re worried about tampering.
-
Angle the camera slightly downward. This improves facial capture and reduces sky glare. Avoid aiming at reflective surfaces like windows or metal siding.
-
Secure the camera. If the location is accessible, use a cable lock or security box. These won’t stop a determined thief with bolt cutters, but they deter casual tampering.
-
Check it after 24 hours. Review the footage to confirm the camera’s working and the detection zone is dialed in. Adjust sensitivity or angle if you’re getting too many false triggers or missing activity.
Safety & Legal Notes:
- PPE: Gloves if mounting in rough terrain: safety glasses if drilling.
- Privacy laws: Trail cameras on your property are generally legal, but avoid pointing them into neighbors’ yards or public spaces where there’s an expectation of privacy. Laws vary by state.
- Power: If using a solar panel accessory, ensure it’s rated for your camera model and positioned to get 4–6 hours of sunlight daily.
Trail Cameras vs. Traditional Security Cameras: Which Is Right for You?
Both have their place, and understanding the trade-offs helps you pick the right tool for the job.
Trail cameras win on:
- Portability and flexibility. No wiring, no network dependency. Set it up, walk away.
- Battery life. Weeks or months per charge vs. hardwired or frequent recharging for wireless security cams.
- Low cost. A capable trail camera runs $60–$150. A comparable outdoor security camera with Wi-Fi and cloud storage can hit $100–$300 per unit, plus subscription fees.
- Stealth. Camouflaged housings blend into outdoor environments.
Traditional security cameras win on:
- Real-time alerts. Wi-Fi cameras send push notifications instantly. Trail cameras either store footage locally or send images via cellular (with a delay and monthly cost).
- Live viewing. Most wired and Wi-Fi systems let you check a live feed anytime. Trail cameras require retrieving the SD card or waiting for transmitted images.
- Integration. Security cameras often work with smart home systems, voice assistants, and automation routines. Trail cameras are standalone.
- Continuous recording. Wired cameras can record 24/7. Trail cameras rely on motion activation, so they may miss activity outside the detection zone.
The best setup? Use trail cameras for perimeter monitoring, outbuildings, and remote zones. Pair them with traditional cameras for high-priority areas like front doors and garages where you want instant alerts and live access. Many outdoor security cameras in 2026 now offer battery options and advanced motion detection, bridging the gap, but they still can’t match the simplicity and endurance of a good trail camera in off-grid applications.
If you’re covering a large property, consider cellular trail cameras. They cost more upfront and require a monthly data plan ($5–$15/month), but you get remote image delivery without sacrificing the battery life and ruggedness that make trail cameras appealing. For smaller yards or purely backup surveillance, stick with SD card models and check footage weekly.
Eventually, trail cameras are a practical, low-maintenance option for DIYers who need coverage beyond the reach of power and Wi-Fi. They won’t replace a full security system, but they fill gaps that traditional outdoor cameras can’t, without the complexity or recurring costs.